Last week we took a trip to Ottawa Street in Hamilton (Ontario), the famous fabric district of Hamilton. There are several shops on one block that have bridal fabrics of great selection and amazing prices. We were looking for a medium weight, silk look, with a glow that is not as much as satin. There were a few that would have been fine, but one seemed just right and we brought it home.
With Christmas, I put it aside until today. One of the details she was wondering about is a large fabric flower with pearls and crystals as an attachment to her left hip, where the draped fabric appears gathered to the side. I thought I may have fun trying my hand at creating this piece as inspiration.
Requires: Fabric scraps, "wonder under" (iron on fusing interfacing), floral wire, beads and pearl accents. Hot glue gun.
I started with two scraps of fabric. On the wrong side of one, I lay 8 4-inch peices of floral wire, as in the photo. I then fused one side of wonder-under to the back of the second piece and peeled the paper off, then ironed it over the wire to the wrong side of the first (sandwiching the wire between the layers.).
 Then I sketched petal shapes on the outside and topstitched with tight, satin zig zag stitch around the shapes, leaving the wire sticking out the narrow end of the petal.
 Carefully cut close to the stitching to release each petal.
 Gather the ends together and use hot glue to secure in a bunch (you can wrap a bit more wire there too).
String some crystals onto some wire and secure in a little loop with 5 or 6 beads in the loop. Twist the ends to secure the beads. I made three of these.
 I also found some pearl strings already on nylon wire, but you could string your own pearls too.
 Then glue the pearls strands under the petals and fasten the crystal loops under a small circle of fabric glued to the center of the flower. Bend and shape the petals to make even and pretty.
 This flower is about 6 inches across, and may be further embelished (more petals, more beads, and maybe feathers) when we actually come to attach it to the dress (near the end of the dressmaking process). At least we have something pretty to look at for now.... :)


 Zipper:
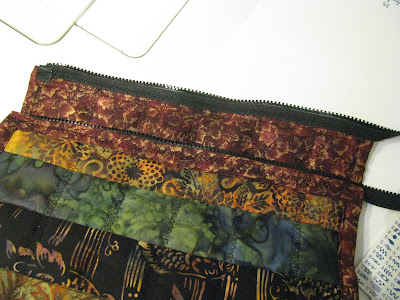
 I attached a chunky separating zipper to the wide open side, using a decorative stitch, then used the same stitch to topstitch down both sides of the case. Nice.

 Chenille knitted swatch, on 6mm needles, gauge 14 sts = 4 inches.
 The crinkle fabric without quilting.
 The different quilting stitches I was fooling around with.
 Stay tuned to see this step by step coat production.


 I still am undecided as to which way to assemble all the pieces. So far I am just enjoying the small random square assembly. I love the black, tan, burgundy and beige colour way.


